Make sure you log in using Google and your @vusd.us account.

The Waiting Room feature allows the host to control when a participant joins the meeting. As the meeting host, you can admit attendees one by one or hold all attendees in the waiting room and admit them all at once. There are a few ways to use enable a Waiting Room for your meeting:
By default, anyone in a Zoom meeting can share their screen. There are two ways to prevent participants from sharing their screen during the meeting:
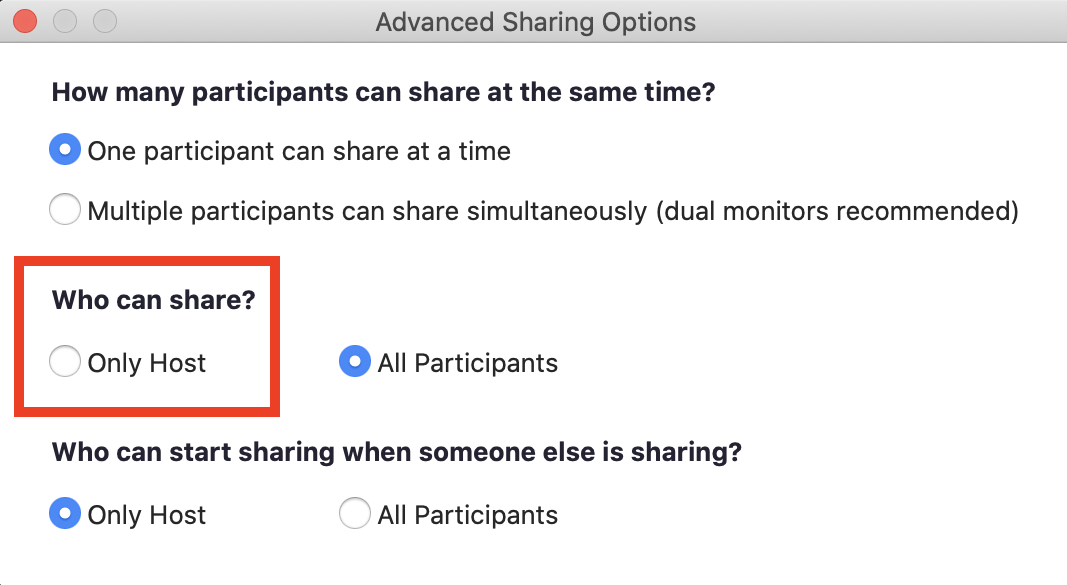
Option 1: Click the “up arrow” next to the Share Screen button in the Zoom meeting control bar, and then click “Advanced Sharing Options…”

Then click on “Only Host” under the who can share options.
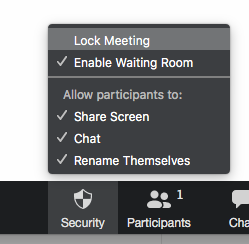
Option 2: This option requires the the host to update to the latest version of Zoom (4.6.10 or higher). Click the “Security” button on the Zoom control bar. Under the heading “Allow participants to:” click on “Share Screen,” and ensure there is no check mark next to Share Screen.
This will prevent participants from annotating over your shared screen. After you’ve shared your screen or whiteboard, click “More” in the screen share controls at the top, and select “Disable Attendee Annotation”

You can mute all participants that are already in the meeting as well as new participants joining the meeting, and restrict them from unmuting their audio. During the meeting, click on “Participants” in the Zoom meeting control bar.

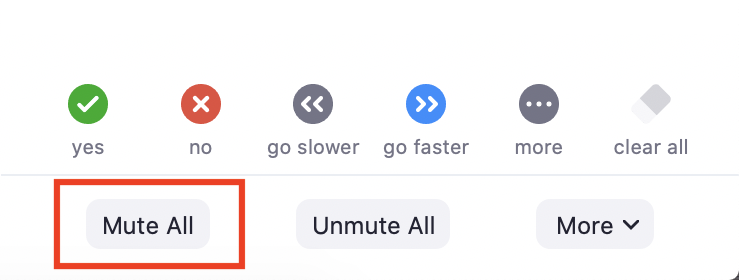
At the bottom of the participants panel click “Mute All.”
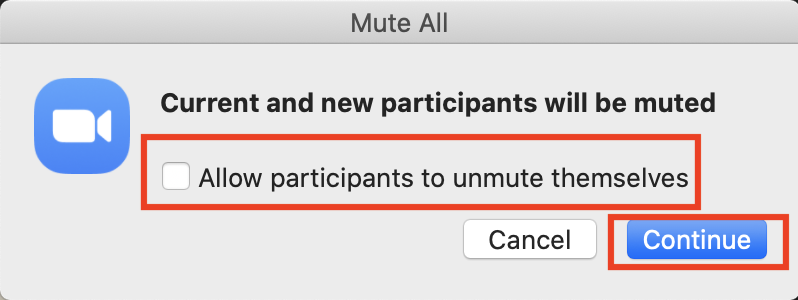
Then, uncheck the “Allow participants to unmute themselves” to prevent participants from talking in the meeting.
By default, participants can send Chat messages privately with anyone and with everyone in the meeting. There are two ways to prevent participants from using the Chat feature in the meeting.
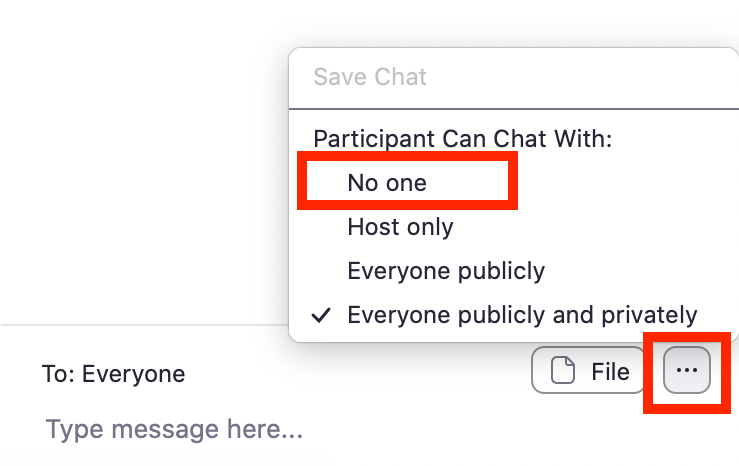
Option 1: During the meeting, click on “Chat” in the Zoom meeting control bar.

In the Chat window click on the “three-dot menu.” Then select “No One” under the “Participants Can Chat With:” to disable the meeting chat feature.
Option 2: This option requires the the host to update to the latest version of Zoom (4.6.10 or higher). Click the “Security” button on the Zoom control bar. Under the heading “Allow participants to:” click on “Chat,” and ensure there is no check mark next to Chat.
You can remove unwanted participants from your Zoom meeting. Note: it is possible for unwanted people to return unless you lock the meeting. To remove a participants during the meeting, click on “Participants” in the Zoom meeting control bar.
In the participants panel, mouse over the person’s name you want to remove, click on “More,” and click “Remove.”

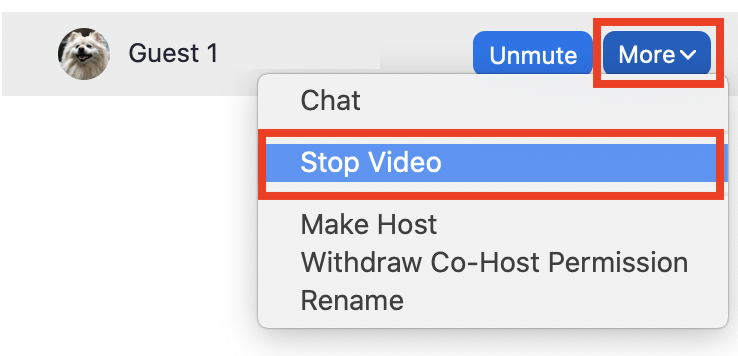
This will stop a participant’s video stream and prevent them from restarting their video. During the meeting, click on “Participants” in the Zoom meeting control bar.
In the participants panel, mouse over a participant’s name, and click “More” and then the “Stop Video” button.
Upon entering a Zoom meeting, participants are automatically given names based on their Zoom account or their computer’s user name. These names are displayed in the participant panel and on the video thumbnails. By default, participants can opt to change their name in the Zoom meeting, and the host can choose to rename participants too. There are two ways to prevent participants from renaming themselves.
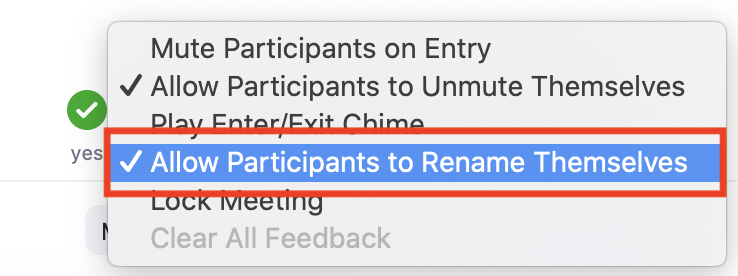
Option 1: Click on “Participants” in the Zoom meeting control bar.
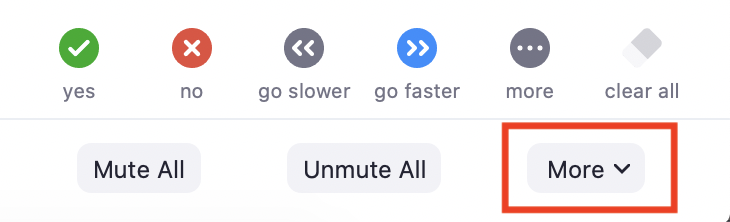
At the bottom of the participants panel click “More.”
Then click on “Allow Participants to Rename Themselves” and ensure there’s no check mark next to this option.
Option 2: This option requires the the host to update to the latest version of Zoom (4.6.10 or higher). Click the “Security” button on the Zoom control bar. Under the heading “Allow participants to:” click on “Rename Themselves,” and ensure there is no check mark next to Rename Themselves.
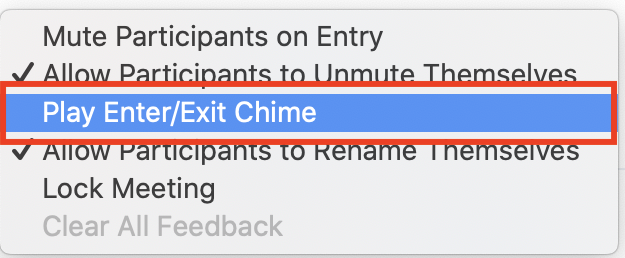
This is helpful for small meetings and cases where participants can pop-in to your meeting. To enable the Enter/Exit Chime during the Zoom meeting, click on “Participants” in the Zoom meeting control bar.
At the bottom of the participants panel click “More.”
Then click on “Play Enter/Exit Chime.”
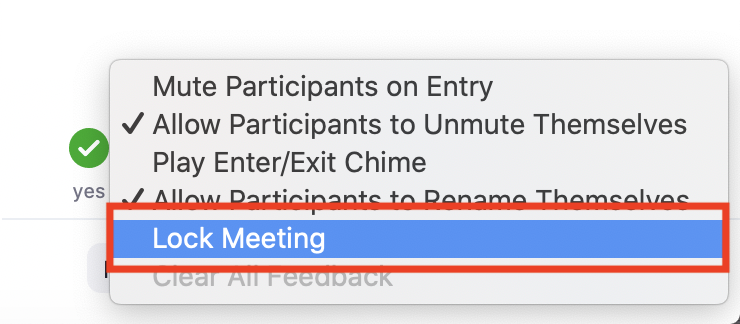
When you lock the meeting, no new participants can join, even if they have the meeting ID and password. There are two ways to lock your meeting:
Option 1: Click on “Participants” in the Zoom meeting control bar.
Then at the bottom of the participants panel click “More.”
Then click “Lock Meeting.”
Option 2: This option requires the the host to update to the latest version of Zoom (4.6.10 or higher). Click the “Security” button on the Zoom control bar. Then click on “Lock Meeting,” and ensure there is a check mark next to Lock Meeting.